This Homemade Ranch Dressing is creamy, tangy, and delicious. You probably already have all of the ingredients in your home, and it's so easy to make. It not only tastes better and fresher than the store-bought stuff, it's a healthier alternative because it doesn't include seed oils, added sugar, and MSG. Simply whisk together the ingredients and enjoy right away or later. This dressing tastes better the next day after the ingredients have had a chance to mingle. Store it in a tightly sealed container in the refrigerator for up to 2 weeks.
Showing posts with label Back to Basics. Show all posts
December 8, 2024
January 8, 2019
Easy Homemade Yogurt - Instant Pot (Cold Start)
I'm here to profess my undying love for my Instant Pot. I've made so many wonderful things with it, and it's hard to choose what has been my favorite so far. Chicken that literally falls off the bone, pot roast that melts in your mouth, healthy bone broth, hearty soups, amazingly creamy yogurt... the list goes on and on.
Who knew homemade yogurt could be so easy and tasty to make!? With the Instant Pot, there's no need to go through the tedious steps of heating the yogurt to 180, cooling it to 115 degrees, etc. This is a cold start recipe, meaning you simply dump the cold ingredients into the pot, cover it, use the yogurt setting, and then chill it in the refrigerator! I won't be using store-bought yogurt anymore! I love the fact that I can control exactly what I put into my yogurt!
Labels:
Back to Basics,
Breakfast,
Dessert,
How To,
Instant Pot,
Skinny,
Vegetarian
January 16, 2015
Homemade Almond Milk (Step-By-Step Instructions)
Making your own almond milk is so easy! You just need to plan ahead for it. It's raw, lactose-free, unprocessed, and healthy. It's also creamy and delicious! Simply soak the almonds in water for 12 hours, drain them, and then process the almonds in the blender with fresh water. You can also add other ingredients such as vanilla, cinnamon and honey. It's so easy!
Note: Homemade almond milk lasts covered in the refrigerator for 3 to 4 days. Use the best quality almonds that you can find for the best results. Hot water makes the almond milk more creamy. Also, the longer you soak the almonds, the more creamy your results will be.
Labels:
Back to Basics,
Drinks,
Skinny,
Vegetarian
October 12, 2014
Homemade Cinnamon-Spiced Applesauce with Canning Instructions
One of my favorite things to do on a chilly fall day is make applesauce. It's super easy, tastes better than any of that store-bought stuff you can buy, and it makes the house smell ahh-mazing while it's simmering! For the best flavor, try to use a variety of apples that are good for cooking such as Fuji, Gala, Pippin, Jonathan, Gravenstein, Rome, Jonagold, Golden Delicious, Granny Smith, and McIntosh. Honeycrisp apples are also very good (actually my favorite), but they are a little more on the watery side. Whenever I use Honeycrisp apples, I reduce the amount of water to usually 3/4 cup. The beauty of homemade applesauce is that it's very forgiving. The natural sweetness of your apples will ultimately determine how much sugar you will want to use. Always start out using less sugar than you think because you can always add more later. If your applesauce is too sweet, add some lemon juice. Try substituting the water for apple juice and even add a touch of pure vanilla extract for some more depth of flavor.
For making a larger quantity of applesauce for canning, see below.
Labels:
Back to Basics,
Dessert,
Fruit,
Vegetarian
June 9, 2014
Black Plum & Ginger Jam (Without Pectin)
Making your own jam is a great way to preserve any in-season fruits that you may have lying around the house. This black plum and ginger jam is so easy and is made without pectin. The ginger gives the jam a wonderful little kick. It's soft, sweet, slightly tart, and spreads like a dream!
Labels:
Back to Basics,
Breakfast,
Fruit,
Jams & Jellies
September 10, 2012
Back to Basics: Homemade Peanut Butter
You can easily make your own peanut butter that tastes just as good, if not better, than store-bought brands. I have found that a lot of recipes call for the addition of different oils, honey, etc., which is completely unnecessary. Commercial brands tend to add in a lot of sugar to their peanut butter and, since most people have become accustomed to that sugary taste, I have included the option of adding confectioner's sugar to match that taste. If you enjoy crunchy peanut butter, simply set aside 1/4 cup chopped peanuts and stir them into the peanut butter at the end.
Homemade peanut butter should be stored in an airtight container in the refrigerator and used within two to three weeks.
Labels:
Back to Basics,
Condiments
September 8, 2012
Back to Basics: Homemade Butter & Buttermilk
A lot of things have been happening here at Cooking Creation over the past several months. I have been doing freelance food writing for food.com and have had to take a little hiatus from blogging while working on a big Thanksgiving project. I'm very excited to share what I've been doing in the next month or so with you. I will have lots of delicious holiday recipes and how-to posts to share with plenty of photos, so stay tuned!
Now that that project is over and my daughter is back to school, my schedule is a little lighter. I decided that I wanted to start posting some back to basics recipes, starting with homemade butter. Making your own butter is incredibly easy and requires only one ingredient.
Labels:
Back to Basics,
Condiments
May 13, 2011
Back to Basics: Homemade Pure Vanilla Extract
I accidentally stumbled upon a comment once about how someone made their own vanilla extract from home. I hesitated for a long time but finally gave in and tried it once I came across Simply Recipes' recipe for it. The result? The taste is better than store-bought, it yields large quantities at a time, it lasts for years, it is extremely easy to make, and it is cost effective! Will I ever buy vanilla extract at the store again? Absolutely not! In fact, once I tasted the results, I tripled the ingredients to make a larger quantity of it.
Note: You can find reasonably priced vanilla beans on Amazon.com.
Labels:
Back to Basics,
Sauces
October 12, 2010
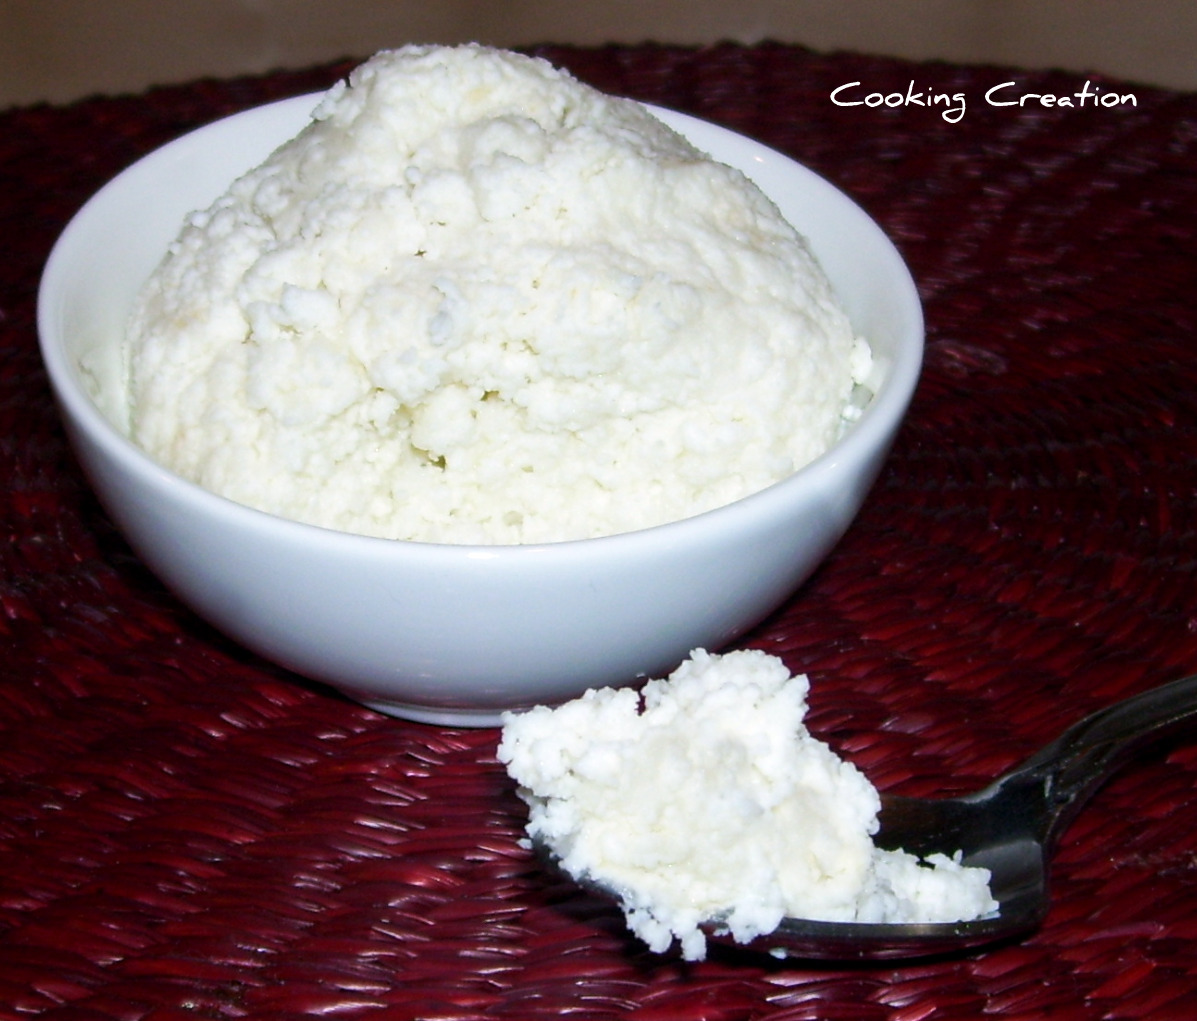
Homemade Ricotta Cheese
Every Monday morning, I plan my meals for the week and run to the grocery store and it makes my life so much easier. Tonight, I had planned to make shepherd's pie but I was craving stuffed shells for some reason, so I decided to scrap the whole shepherd's pie thing. It is rare for me to stray from my meal plan. I normally use ricotta in my stuffed shells but I didn't have any because I didn't plan to make them in the first place. The fact that I had no ricotta in my fridge really irritated me. I did not want to run out to the store for it, so I decided to try to make some from scratch. Success! I will never buy ricotta again. Once you realize how easy and fun it is to make, you'll never want to buy it again either. And the taste? Oh, the taste! It is so, SO much better than store bought. Try it! This yields approximately 4 ounces.

Ingredients:


Ingredients:
- 1 qt milk (any milk will do but my preference is fat free)
- 2 tsp salt
- 2 tbsp white vinegar
- 1 tbsp lemon juice
- Bring the milk and salt to a boil over medium heat.
- Remove from heat and stir in vinegar and lemon juice. Allow to cool completely.
- Pour the contents through a cheesecloth and drain.

- Once drained, close up the cheesecloth around the cheese and fasten.
- Allow to drip for at least an hour. The longer you allow it to drip, the drier the cheese will be. I allowed mine to drip for about three hours because I like it a bit more crumbly. If you want it to be more creamy, stir in a tiny bit of warm milk, to desired creaminess.
- Enjoy!
Labels:
Back to Basics,
Cheese
Subscribe to:
Posts (Atom)